Showing posts with label spring summer 09. Show all posts

Tuesday, June 2, 2009

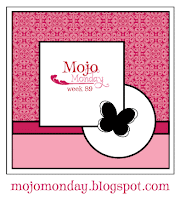
Mojo Monday Sketch 89

Here is this week's Mojo Monday sketch challenge. I pulled out the beautiful Garden Whimsy stamp set for this sketch. The background paper is the Tea Party designer series paper. The circles I cut out with my Circle Scissors Plus. The butterfly was stamped and then cut out and added to the page with dimensionals. The finishing touches was the certainly celery ribbon and the Filigree designer brads.

Friday, May 29, 2009

Cheap Talk Homemade Birthday Card

Here is the wonderful Cheap Talk stamp set. I stamped the birdie with Pacific Point, wiped off the ink from the beak and then used my Ruby Red Stampin' Write Marker to color it in. Then the greeting comes from the On Your Birthday stamp set. I then I loved that I was able to stamp the image and then with my clear Sizzex circle I was able to cut the image out just right to fit in the circle. I then layered it on top of the Old Olive Scallop Circle diecut. Next I made a scallop edge border on the bottom. I added the Good Morning Sunshine designer series paper. The Old Olive wide grosgrain ribbon and the retired buttons.

Tuesday, May 26, 2009

Inspiration Challenge from the Inkredible Group

One of my fellow Inkthinkers just posted this challenge on our board: Take the photo of the dinnerware. Use the colors, the pattern or whatever else inspires you about this picture and make your project. Well I decided to make a scrapbook page that I am going to put in a shadowbox for two of my friends that recently tied the knot. I started with the background paper, Textiles. I then made a eyelet border on a piece of Night of Navy. I attached the Organza ribbon and made a tailored bow and attached it to the page. Next came the diecut I made with Join in the Cheer. Next, I added three halfback pearls to the page. I stamped the roses from the Fifth Avenue Floral stamp set and cut them out and attached them to the page with Stampin' Dimensionals. Lastly, I did a little journaling on my computer and put then with Designer Label punch, I punched out the journaling and put in a Styled Silver Hardware frame. Thank you Kelly for the challenge!

Thursday, May 21, 2009

Homemade Sympathy Card


Here is a sympathy card I made for a friend recently. I started with the Top Note that I diecut with my Sizzex. I then colored in the tree and the leaves from the Thoughts and Prayers stamp set with my Stampin' Write Markers. The background paper comes from the Kiwi Kiss Patterns Paper. I then added the twill tape with the retired pewter Hodgepodge Hardware. I then added two vintage brads. The last touch was the scallop edge border.

Tuesday, May 19, 2009

Mojo Monday Sketch #87


Here is this Monday's Mojo Monday Sketch. The greeting comes from the On Your Birthday stamp set. I then stamped two of the flowers from the Fifth Avenue Floral stamp set. I cut them out and attached them to the card with Stampin' Dimensionals. I layered the large flower on top of a circle I cut with my Circle Scissor Plus and then on top of a the diecut Sizzex Scallop Circle #2. The background of the card, I added the Walk in the Park designer series paper and then a scallop border, followed lastly with baja breeze card stock ran through with Texturz Plates with the Stampin' Up! Backgrounds I. The last touch was the White Organza ribbon and 3 jumbo brads.

Monday, May 4, 2009

Mojo Monday Continues

I decided to do the Mojo Monday Sketch again. I have to say I am lovin' these sketches. They post a new one every Monday. I couldn't wait to try this one today. The background paper comes from the Parisian Breeze designer series paper pack. The floral image comes from the Echoes of Kindness stamp set. Unfortunately, I needed another sympathy card so the sentiment comes from the Thoughts and Prayers stamp set. The finshing touches was the scallop edge punch, the corduroy button with linen thread and twill chocolate chip ribbon that I adhered a strip and then tied a bow and attached with a glue dot.

Sunday, May 3, 2009

Mojo Monday Sketch

I decided to play and do the Mojo Monday Sketch. I have to say I am happy I did. I love the way this card came out. The two background designer series paper sets I used were the Bella Rose and the Kiwi Kiss Patterns packs. The stamped images came from the Thoughts and Prayers stamp set and the A Little Somethin' stamp set. I colored in the images with my Stampin' Write Markers. The Thanks a Bunch I punched out with my 1 3/4" circle punch and then layered on a circle I cut out with my Circle Scissors Plus. To finish the card off, I added to two gold brads and a strip of Kiwi Kiss/Very Vanilla satin ribbon accross the middle and a bow tied and attached with a mini glue dot.

Saturday, May 2, 2009

May Open Workshop


May's open workshop will be held on two dates:

Tuesday, May 19th 7 p.m.
Wednesday, May 27th 7 p.m.

We will be making three projects: 2 cards and 12x12 page double scrapbook layout. We will be working with the Big Shot dies: Clear Circle, Naturally Serif and Stampin' Up! Birds & Blooms as well as the Eyelet border, Scallop Edge and Boho Blossoms punches.
Workshop Fee: $15

Bring a friend that is new to stamping and me and you and your friend will pay half price for the class fee! So you and your friend will only have to pay $7.50 for the class. Place a 50$ order or more and your class fee is waived.

Please RSVP as soon as possible for all events so that the card stock is ready for everyone to start stamping when the event begins.

Featuring stamp sets (in order as they appear on this entry): Always, Cheap Talk, On Your Birthday, Eastern Blooms and Great Friend

School Days Scrapbook Page


Here is this week's color challenge: Tangerine Tango, Kiwi Kiss and Chocolate Chip. I decided to pull out the Owl from the Bright Delights Rub-ons. I die cut the letters with my Sizzex Serif Essentials Alphabet with chipboard covered with card stock. The bottom of the page although it is hard to see I added a strip of wide grosgrain ribbon. I then followed with some of the rub-on borders from the Bright Delights set. In the center of the page you can find strip of Tangerine Tango and Kiwi Kiss. The background comes from Chocolate Chip Patterns designer series paper. I die cut the journaling frame with the Sizzex Bookplates. I love this die cut. I attached it to the page with vintage brads. The last touch was the 3 jumbo pewter eyelets I attached to the page with my crop-a-dile. Make sure to check out the following links for more ideas using the color combos of the week from our color girls: Colleen, Debbie, Lorraine, Kelly, Traci and Tracy.

Tuesday, April 28, 2009

A Manly Birthday Card

Here is a manly birthday card for a good friend of mine. I stamped the beer mugs from the Cheers to You stamp set. I colored them in with the More Mustard Stampin' Write Markers. I punched the image out with my PaperShapers 2 3/4" circle punch which followed with a circle I made with the Circle Scissors Plus. The background of the card comes from the Parisian Breeze Designer Series Paper. The finishing touches were the the wide chocolate grosgrain ribbon, the corduroy button with linen thread, the scallop border and three punches made with the retired 1/4" square punch.

Sunday, April 26, 2009

Homemade First Holy Communion Card

Here is homemade First Holy Communion Card made with the Special Blessings stamp set. The colors are Sahara Sand and Sage Shadow. The background paper comes from To the Nines Speciality designer series paper. The finishing touches were the Latte Button, the strip of Sage Shadow and the eyelet border.

Saturday, April 25, 2009

Color Challenge


Here is this week's color challenge. It is Riding Hood Red, Always Artichoke and Basic Grey. The border of the page I used the Walk in the Park designer series paper in the Occasions mini. The next border as well as the flower petals comes from the Riding Hood Red Patterns Designer Series Paper. The flower petals were made with my Wide Oval punch. The stem I cut out with my Cutter Kit. The flower petal I die cut with my Flower Layers with Leaf Sizze. I also diecut the center of the flower with a piece of white paper applied to a piece of chipboard. I used the Circles Sizzex die cut for that. The greeting comes from the Good Friend stamp set. The butterflies come from the flight of the butterfly stamp set. The finishing touch was the 3 white jumbo brads.
Make sure to check out the following links for more ideas using the color combos of the week from our color girls: Colleen, Debbie, Lorraine, Kelly, Traci and Tracy.

Wednesday, April 15, 2009

Engagement Party Invitations

Here are the second set of homemade invitations that I just finished off. They were for my cousin's engagement party. I started die cutting the Clear Circle. Then I stamped the flowers in Baja Breeze from the Fifth Avenue Floral stamp set and cut them out. I attached them to the front of the invitations with Stampin' Dimensionals. The greeting comes from the Together Forever stamp set. The finishing touch was two silver brads. The folded a piece of card stock and ran it through the Big Shot with the Scallop Circle die cut. I made sure to put the fold a little lower than the top of the scallop. This allowed for a fold to remain so the scallop opened up like a card.

Tuesday, April 14, 2009

First Communion Invitations

I have been busy making homemade invitation lately. Here are homemade First Communion invitations I made for a customer of mine. I used the cross from the Special Blessing stamp set. I stamped it in Lavendar Lace. I had a cross punch I picked up in AC Moore awhile ago. I punched Lavendar Lace card stock and put a silver brad through the center. I attached the cross to the invitation with a Stampin' Dimensional. Then an eyelet border finishes the invitation off.


Tuesday, April 7, 2009

Countdown to Easter

In the next couple of days, I'll be counting down the days to Easter with tags, card and treat holders. So here's the first one. I was in Babys R Us and I was getting a little something extra for nephew for Easter. Looked around for a gift bags, found large ones but they were going for 5$. As I got to the register I found this great large "green" bag at the register for $1.50. How great is that. It's a lot more sturdy than the gift bags. So I decided to dress it up with a homemade gift tag. So since it was a big bag, I decided to pull out a my Sizzex Serif Essentials Die Cuts. For the side I made an eyelet border in the Almost Amethyst and laid a piece of the Afternoon Tea Designer Series Paper. I then stamped the eggs from the Wagon Full of Fun stamp set. I colored them in with Stampin' Write markers and adhered them to the tag with Stampin' Dimensionals. Lastly, I made a hole with my Crop-a-dile and tied a white taffeta bow.

Sunday, March 29, 2009

Manhattan Flower Impression Die in a Scrapbook Page


Here is a scrapbook page made with the Manhattan Flower Impression Die. I decided to cut the flower out and then it added to the border of my page. Here it is on a scrapbook page from photos of my brother on his wedding day. I die cut the title from the Serif Essentials Alphabet with my Big Shot. Strips of To the Nines Specialty Designer Series Paper and eyelet border in pretty in pink were added to the page. I stamped words from the Together Forever stamp set. Three Rhinetone brads were added to the page as embellishments. I have to say after I created the pages I realized the page on the left would be great to show a progression page from 8x8 to 8 1/2 x 11 to 12x12.

Manhattan Flower Textured Impression Die


I have to say I love the Manhattan Flower Textured Impression Die! All you do is put your piece of paper inside the folder and then run it through the Big Shot. Look at the beautiful embossed image that comes out. So simple, so elegant. The floral impression fits a 4 1/4" x 5 1/2 piece of card stock perfectly. Here I added an eyelet border punch and tied a piece of Kraft taffeta ribbon. I added three half back pearls and stamped the greeting from the Sincere Salutations stamp set. For $7.95, it is a great addition to you Big Shot collection.

Monday, March 23, 2009

Getting Ready for another Crop


This coming Saturday the 28th, I get to spend the day with my friends scrapbooking at the Wood-Ridge PTA crop. Here is a raffle I put together for the event. The gift tag I made with the Rainbow Sherbert designer series paper. I die cut the letters with my Big Shot and the Naturally Serif alphabet Sizzex. I made the flower with my Flower Layeers with Leaf die cut. I put a 5/16" Jumbo Silver Brad in the center and popped up the flower on the tag with Stampin' Dimensionals. I then added two 5/8" Silver brads on the bottom. The finishing touches was the strip of tempting turquoise grosgrain ribbon and the scallop edge border. There is still room at the crop, email me if you want to hear more details.

Tuesday, March 17, 2009

Happy St. Patrick's Day!


Happy St. Patrick’s Day Everyone! I am not having a good day with my camera today. I have a feeling after 5 years it’s not going to make it. So this morning’s color challenge post I took a picture with my camera phone. Not a bad photo if I say so myself. I wanted to post this week’s color challenge today since it is anything GREEN in honor of St. Patrick’s Day!

So here is the card in Kiwi Kiss. I started with the new designer series paper that is coming in the Occasions Mini, called Walk in the Park. I die cut an Oval with Ovals Sizzex die. I then stamped the tree from the Thoughts & Prayers stamp set. Then I added a Kiwi Kiss button with linen thread. Next I stamped the greeting from the On Your Birthday stamp set I punched a hole with my crop-a-dile and then threaded a piece of Kiwi Kiss/Very Vanilla Satin Ribbon. When I tied the knot, I moved the ribbon so it covers up the hole made with crop-a-dile. Lastly, I put an eyelet border on the bottom of the card.
Make sure to check out the following links for more ideas using the color combos of the week from our color girls: Colleen, Debbie, Lorraine, Kelly, Traci and Tracy.

Monday, March 9, 2009

Inkredible Challenge

This week's challenge was to open up the Stampin' Up! catalog and flip through the catalog and stop on a random page. Pick a project from that page. Now, you need to make the same project but different. What does this mean, you ask?... You can use the sketch with different stamps and colors. or just swap out the colors, but make the project the same as shown. You can also just use the same colors or stamps on your chosen project. So I my project is the scrap page on page 124. (see below for the picture out of the catalog.) The page in the book was an 8x8 but I decided to make an 8 1/2 x11 which left me a little more room for embellishments so it looks slightly different.

So here is my scrapbook page of my nephew on his 1st birthday. I just love this picture of him. I pulled out the retired Creative License scrappin' kit and the Take Note rub-ons. The limited edition and the white cirlce on the bottom come from the rubons. The rest of the paper and the self-adhseive die cuts come from the kit. The only other thing I used was the Wild Wasabi prints designer series paper to make the pocket. I folded over the paper from all three sides to make the pocket and then used my 1" punch to make the opening. The insert, I punched a round tab punch and put a 5/18" silver brad in the center. I also punched two stars with my large and small star punches to put on the page. I also made the one with my On Board Timeless Type chipboard. I sponged on some Blue Bayou ink.